Friday, November 23, 2012

PIVOT and UNPIVOT Operations in sql server

Introduction :

PIVOT turns unique values from one column in a table to multiple columns and also performs aggregation on other columns if required . UNPIVOT performs the reverse operation of PIVOT .
PIVOT does not actually change the structure of table in database , it only turns the data to view it from different perspectives.

Example using PIVOT and UNPIVOT :

Here I will take a simple example to illustrate PIVOT and UNPIVOT operations.
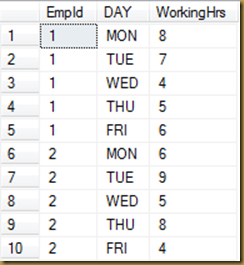
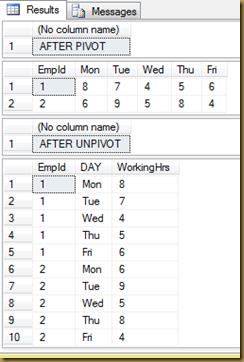
Let us suppose we have a table with the following information employee id  ,day in a week and working hours of employee. (Just to illustrate ,I have considered data of 5 days in a week , scenarios could be different )

Pivot_Op1
Now if we want to generate a report of an employee with his average or sum of working hours for all the days in a week  i.e if you want to turn the row information into columns as below , we can use PIVOT and to revert it use UNPIVOT.

Pivot_op2

Code – PIVOT Operation

BEGIN
    DECLARE @Emp_Attendance AS TABLE
    (
        EmpId INT ,
        [DAY] VARCHAR(10),
        WorkingHrs INT
    )
    INSERT INTO @Emp_Attendance VALUES(1,'MON',8)
    INSERT INTO @Emp_Attendance VALUES(1,'TUE',7)
    INSERT INTO @Emp_Attendance VALUES(1,'WED',4)
    INSERT INTO @Emp_Attendance VALUES(1,'THU',5)
    INSERT INTO @Emp_Attendance VALUES(1,'FRI',6)
    INSERT INTO @Emp_Attendance VALUES(2,'MON',6)
    INSERT INTO @Emp_Attendance VALUES(2,'TUE',9)
    INSERT INTO @Emp_Attendance VALUES(2,'WED',5)
    INSERT INTO @Emp_Attendance VALUES(2,'THU',8)
    INSERT INTO @Emp_Attendance VALUES(2,'FRI',4)
    /*PIVOT*/
    SELECT EmpId ,[Mon] ,[Tue],[Wed],[Thu],[Fri] FROM
    (SELECT EmpId ,DAY,WorkingHrs FROM @Emp_Attendance) AS A
    PIVOT
    (
    AVG(WorkingHrs)
    FOR DAY IN ([Mon] ,[Tue],[Wed],[Thu],[Fri])
    )AS B
END
GO

Code – UNPIVOT Operation
 

BEGIN
    DECLARE @Emp_Attendance AS TABLE
    (
        EmpId INT ,
        [DAY] VARCHAR(10),
        WorkingHrs INT
    )
    INSERT INTO @Emp_Attendance VALUES(1,'MON',8)
    INSERT INTO @Emp_Attendance VALUES(1,'TUE',7)
    INSERT INTO @Emp_Attendance VALUES(1,'WED',4)
    INSERT INTO @Emp_Attendance VALUES(1,'THU',5)
    INSERT INTO @Emp_Attendance VALUES(1,'FRI',6)
    INSERT INTO @Emp_Attendance VALUES(2,'MON',6)
    INSERT INTO @Emp_Attendance VALUES(2,'TUE',9)
    INSERT INTO @Emp_Attendance VALUES(2,'WED',5)
    INSERT INTO @Emp_Attendance VALUES(2,'THU',8)
    INSERT INTO @Emp_Attendance VALUES(2,'FRI',4)
    /*PIVOT*/
    SELECT EmpId ,[Mon] ,[Tue],[Wed],[Thu],[Fri] INTO #temp_Pivot FROM
    (SELECT EmpId ,DAY,WorkingHrs FROM @Emp_Attendance) AS A
    PIVOT
    (
    AVG(WorkingHrs)
    FOR DAY IN ([Mon] ,[Tue],[Wed],[Thu],[Fri])
    )AS B
    SELECT 'AFTER PIVOT'
    SELECT * FROM #temp_Pivot
    SELECT 'AFTER UNPIVOT'
    /*UNPIVOT*/
    SELECT EmpId , DAY,WorkingHrs FROM
    (SELECT EmpId,Mon,Tue,Wed,Thu,Fri FROM #temp_Pivot ) AS A
    UNPIVOT
    (
        WorkingHrs FOR DAY IN (Mon,Tue,Wed,Thu,Fri)
    ) AS B
END
GO

Output :

Pivot_op3

Tuesday, November 20, 2012

Common Table Expression

In Sql Server suppose you want to write a query to display numbers from 1 to 10 in sequence , then we either use while loop or cursor. If our requirement is for a simple task , then we can make use of cursors and loop. If it is little complex, then we have to write lot of code using a cursor . But by using CTE we can reduce number of lines of our code and make it simpler. To retrieve hierarchical data efficiently CTE can be used.

Sample Example – Common Table Expression

Example : Write a query to Output numbers from 1 to 10 in sequence.

/*DISPLAY LIST OF NUMBERS FROM 1 to 10*/

BEGIN

DECLARE @Start INT , @End INT

SET @Start = 1

SET @End = 10

;WITH Series AS

(

SELECT @Start AS List --INITIALISATION PART

UNION ALL

SELECT List + 1 FROM Series WHERE List < @End --RECURSION PART

)

SELECT * FROM Series

/*changing recursion limit

SELECT * FROM Series OPTION (MAXRECURSION 150)

*/

END

GO

Points to be remembered:

1) The previous statement must be terminated with a semicolon if we are using CTE , so place a semicolon before Common Table Expression.

2) By default Maximum No of recursions is limited to 100 . If the query undergoes more than 100 recursions, it throws an error.

3) If one want to change the maximum limit of transactions , then use OPTION (MAXRECURSION 200) in Select statement . Maximum recursion limit one can specify for integers is 32767.

4) To see intermediate output , then specify OPTION (MAXRECURSION @RecursionNo) . Suppose the query takes 10 recursions and we wish to see output after 2nd recursion , then include option(MAXRECURSION 2) in select statement.

Retrieve hierarchical data using CTE :

Example :We have employee table with 3 columns ( empid , empname , reportsto) employee id , name and his manager information. Now to generate report of an employee in hierarchy -- “to whom he reports and employees who report to him ( subordinates) and their subordinates also” .


BEGIN

DECLARE @TblEmployees AS TABLE

(

EmployeeID INT PRIMARY KEY ,

EmpName VARCHAR(100),

ReportsTo INT NULL

)

INSERT INTO @TblEmployees VALUES( 1 , 'Ram' , NULL)

INSERT INTO @TblEmployees VALUES( 2 , 'Raj' , NULL)

INSERT INTO @TblEmployees VALUES( 3 , 'Ravi' , NULL)

INSERT INTO @TblEmployees VALUES( 4 , 'Rakhi' , 1)

INSERT INTO @TblEmployees VALUES( 5 , 'Rajesh' , 2)

INSERT INTO @TblEmployees VALUES( 6 , 'Ravinder' , 3)

INSERT INTO @TblEmployees VALUES( 7 , 'Sailender' , 3)

INSERT INTO @TblEmployees VALUES( 8 , 'Vikram', 6)

INSERT INTO @TblEmployees VALUES( 9 , 'Tarun' , 7)

;WITH ReportingOfficers AS

(

SELECT EmployeeID,EmpName , ReportsTo FROM @TblEmployees WHERE EmployeeID = 3 --ReportsTo IS NULL

UNION ALL

SELECT E.EmployeeID , E.EmpName,E.ReportsTo FROM @TblEmployees E , ReportingOfficers M

WHERE M.EmployeeID = E.ReportsTo

)

SELECT * FROM ReportingOfficers

END

GO

Here i queried for employee id 3.so the result contains details of employee id 3 , his manager details and his subordinates , and sub- subordinates data.

Output :

Common Table Expression

Friday, November 16, 2012

Write text to Notepad using C#


In this article i will illustrate how to create text file , write and append text to it using C#.

Aspx Code :

<%@ Page Language="C#" AutoEventWireup="true" CodeFile="SaveTextToaFile.aspx.cs" Inherits="Forum_Topics_SaveTextToaFile" %>

<!DOCTYPE html PUBLIC "-//W3C//DTD XHTML 1.0 Transitional//EN" "http://www.w3.org/TR/xhtml1/DTD/xhtml1-transitional.dtd">

<html xmlns="http://www.w3.org/1999/xhtml">
<head runat="server">
    <title>SAVING TEXT TO A FILE</title>
</head>
<body>
    <form id="form1" runat="server">
    <div>
        <table>
            <tr>
                <td>
                    Write few words about you:
                </td>
                <td>
                    <asp:TextBox ID="txtAboutYou" runat="server" TextMode="MultiLine"></asp:TextBox>
                </td>
            </tr>
            <tr>
                <td colspan="2" align="center">
                    <asp:Button ID="btnSaveText" runat="server" Text="SaveText" OnClick="btnSaveText_Click" />           
                </td>
            </tr>
             <tr>
                <td colspan="2" align="left">
                <asp:Label ID="lblMsg" runat="server" ForeColor="Red" ></asp:Label>
                </td>           
            </tr>
        </table>
    </div>
    </form>
</body>
</html>

Code Behind :

using System;
using System.Collections.Generic;
using System.Linq;
using System.Web;
using System.Web.UI;
using System.Web.UI.WebControls;
using System.IO;

public partial class Forum_Topics_SaveTextToaFile : System.Web.UI.Page
{
    protected void Page_Load(object sender, EventArgs e)
    {

    }
    protected void btnSaveText_Click(object sender, EventArgs e)
    {
        /*FILE NAME OR PATH TO FILE*/
        string Filename = "C:\\Users\\Administrator\\Desktop\\Profile.txt";
        //CHECK FOR FILE EXISTENCE
        if (!File.Exists(Filename))
        {
            //CREATE FILE
            StreamWriter txtFile = File.CreateText(Filename);
            txtFile.Close();
            //APPEND TEXT
            txtFile = File.AppendText(Filename);
            txtFile.WriteLine(txtAboutYou.Text);
            txtFile.Close();
        }
        else
            //APPEND TEXT
            File.AppendAllText(Filename, txtAboutYou.Text);

        lblMsg.Text = "Text is saved";
    }
}

Friday, November 9, 2012

How to Read DBF file in C# and display in a gridview


we can use two connections to deal with dbf files.
one is Odbc Connection and the other one is OleDb Connection

Read .Dbf file using ODBC Connection

Steps to read dbf file :
1)Create Obdc Connection object.
2)Specify connection string as follows:

obdcconn.ConnectionString = "Driver={Microsoft dBase Driver (*.dbf)};SourceType=DBF;SourceDB=" + FilePath+ ";Exclusive=No; NULL=NO;DELETED=NO;BACKGROUNDFETCH=NO;";

3)Open Connection
4)write a command (query) to read data from dbf file.
5)store it in DataTable using ExecuteReader.
6)Bind DataTable to grid.

Apsx Code :

<%@ Page Language="C#" AutoEventWireup="true" CodeFile="ReadDBFFile.aspx.cs" Inherits="Forum_Topics_ReadDBFFile" %>

<!DOCTYPE html PUBLIC "-//W3C//DTD XHTML 1.0 Transitional//EN" "http://www.w3.org/TR/xhtml1/DTD/xhtml1-transitional.dtd">

<html xmlns="http://www.w3.org/1999/xhtml">
<head runat="server">
    <title></title>
</head>
<body>
    <form id="form1" runat="server">
    <div>
        <asp:Label ID="lblResult" runat="server" ForeColor="Red"></asp:Label>
        <br /><br />
        <asp:GridView ID="gv1" runat="server"></asp:GridView>
    </div>
    </form>
</body>
</html>

Code Behind :

using System;
using System.Collections.Generic;
using System.Linq;
using System.Web;
using System.Web.UI;
using System.Web.UI.WebControls;
using System.Data.OleDb;
using System.Data;
using System.Data.SqlClient;
using System.Configuration;
using Microsoft.Win32;
using System.Data.Odbc;

public partial class Forum_Topics_ReadDBFFile : System.Web.UI.Page
{
    protected void Page_Load(object sender, EventArgs e)
    {
            ReadDBFUsingOdbc();
    }

public void ReadDBFUsingOdbc()
   {

       string FilePath= "C:\\Users\\Administrator\\Desktop\\";
       string DBF_FileName = "SCTFIN.dbf";
       OdbcConnection obdcconn = new System.Data.Odbc.OdbcConnection();      
       obdcconn.ConnectionString = "Driver={Microsoft dBase Driver (*.dbf)};SourceType=DBF;SourceDB=" + FilePath+ ";Exclusive=No; NULL=NO;DELETED=NO;BACKGROUNDFETCH=NO;";
       obdcconn.Open();
       OdbcCommand oCmd = obdcconn.CreateCommand();
       oCmd.CommandText = "SELECT * FROM " + FilePath + DBF_FileName;

         /*Load data to table*/

       DataTable dt1 = new DataTable();
       dt1.Load(oCmd.ExecuteReader());
       obdcconn.Close();

         /*Bind data to grid*/

       gv1.DataSource = dt1;
       gv1.DataBind();


       lblResult.Text = "Congratulations, your .dbf file has been transferred to Grid.";

   }

}

Note : To open Odbc Connection  , Odbc driver should be there in your system.

Output :

ReadDBFFile_1

Read .Dbf file using OleDB Connection
Steps to read dbf file :
1)Create OleDB Connection object.
2)Specify connection string as follows:

OleDbConnection conn = new OleDbConnection("Provider=Microsoft.Jet.OLEDB.4.0;Data Source=" + FilePath+ ";Extended Properties=dBASE IV;");

                                   OR

OleDbConnection conn = new OleDbConnection(@"Provider=vfpoledb;Data Source=" + FilePath+ ";Collating Sequence=machine;");

3)Open Connection
4)write a command (query) to read data from dbf file.
5)store it in datatable using Executereader.
6)Bind datatable to grid.

Note : With OleDB Connection and can use either “ Microsoft.Jet.OLEDB.4.0” provider or “vfpoledb” provider.

vfpoledb Provider : The Visual FoxPro OLE DB Provider (VfpOleDB.dll) exposes OLE DB interfaces that you can use to access Visual FoxPro databases and tables from other programming languages and applications.

This provider can be downloaded from http://www.microsoft.com/downloads/details.ASPx?familyid=e1a87d8f-2d58-491f-a0fa-95a3289c5fd4&displaylang=en 

To check if   vfpoledb provider is registered in your system , use the following function . If registered , it returns true , else false.

public static bool IsInstalled()
    {
        return Registry.ClassesRoot.OpenSubKey("TypeLib\\{50BAEECA-ED25-11D2-B97B-000000000000}") != null;
    }

Apsx Code : Same as above

Code Behind :

using System;
using System.Collections.Generic;
using System.Linq;
using System.Web;
using System.Web.UI;
using System.Web.UI.WebControls;
using System.Data.OleDb;
using System.Data;
using System.Data.SqlClient;
using System.Configuration;
using Microsoft.Win32;
using System.Data.Odbc;

public partial class Forum_Topics_ReadDBFFile : System.Web.UI.Page
{
    protected void Page_Load(object sender, EventArgs e)
    {
        ReadDBFUsingOleDB();
    }

    public void ReadDBFUsingOleDB()
    {

        string FilePath= "C:\\Users\\Administrator\\Desktop\\";
        string DBF_FileName = "SCTFIN.dbf";
        //define the connections to the .dbf file
        //OleDbConnection conn = new OleDbConnection(@"Provider=vfpoledb;Data Source=" + FilePath+ ";Collating Sequence=machine;");
        OleDbConnection conn = new OleDbConnection("Provider=Microsoft.Jet.OLEDB.4.0;Data Source=" + FilePath+ ";Extended Properties=dBASE IV;");

        OleDbCommand command = new OleDbCommand("select * from " + DBF_FileName, conn);
        conn.Open();
      

//open the connection and read in all the data from .dbf file into a datatable
        DataTable dt = new DataTable();
        dt.Load(command.ExecuteReader());
        gv1.DataSource = dt;
        gv1.DataBind();
        conn.Close();  //close connection to the .dbf file
       

lblResult.Text = "Congratulations, your .dbf file has been transferred to Grid.";
    }
}

Output : Same as above

Thursday, November 8, 2012

Import data from Excel to Database Using ASP.NET

Sample Code to Import Excel data to a table in Database :

            Open Source and Detination Connections. Here Source Connection is to read data from Excel File.So to work with Excel file we need to use OleDB Connection. Destination is Database . So open SqlConnection.
Then make sure that Destination table into which Excel data is imported is present the database (else create it).The column names of this table must match with those in the Excel file.

Aspx Code :

<%@ Page Language="C#" AutoEventWireup="true" CodeFile="UploadExcelFile_StoreinDB.aspx.cs" Inherits="UploadExcelFile_StoreinDB" %>

<!DOCTYPE html PUBLIC "-//W3C//DTD XHTML 1.0 Transitional//EN" "http://www.w3.org/TR/xhtml1/DTD/xhtml1-transitional.dtd">

<html xmlns="http://www.w3.org/1999/xhtml">
<head runat="server">
    <title>IMPORT EXCEL DATA AND STORE ITS CONTENTS IN DATABASE TABLE</title>
</head>
<body>
    <form id="form1" runat="server">
    <div>
        <table>
            <tr>
                <td colspan="2">
                    <asp:Label ID="LblMsg" runat="server" ForeColor="Red" ></asp:Label>
                </td>
            </tr>
            <tr>
                <td colspan="2" align="center">
                    <asp:Button ID="btnImport" runat="server" Text="Import Excel to DB" OnClick="btnImport_Click" />
                </td>
            </tr>
        </table>
    </div>
    </form>
</body>
</html>

Code Behind :

using System;
using System.Collections.Generic;
using System.Linq;
using System.Web;
using System.Web.UI;
using System.Web.UI.WebControls;
using System.Configuration;
using System.Data.OleDb;
using System.Data.SqlClient;

public partial class UploadExcelFile_StoreinDB : System.Web.UI.Page
{
    protected void Page_Load(object sender, EventArgs e)
    {

    }
    protected void btnImport_Click(object sender, EventArgs e)
    {
        string SourceConnStr = "PROVIDER=Microsoft.ACE.OLEDB.12.0;Data Source=C:/Users/Administrator/Desktop/SavetoDB.xlsx;Extended Properties='Excel 12.0 Xml;HDR=YES'";
        string DestConnStr = ConfigurationManager.ConnectionStrings["MyConString"].ToString();
        OleDbConnection SourceConn = new OleDbConnection(SourceConnStr);
        using (SourceConn)
        {
            string sql = string.Format("Select [ID],[Name],[Age],[Address] FROM [{0}]", "Sheet1$");
            OleDbCommand command = new OleDbCommand(sql, SourceConn);
            SourceConn.Open();
            using (OleDbDataReader dr = command.ExecuteReader())
            {
                using (SqlBulkCopy bulkCopy = new SqlBulkCopy(DestConnStr))
                {
                    bulkCopy.DestinationTableName = "tblImportfromExcel";
                    /*COLUMNN MAPPING STARTS*/
                    /*YOU CAN MANNUALY SET THE COLUMN MAPPING BY THE FOLLOWING WAY , IF COLUMN ORDER IS DIFFERENT FROM EXCEL.
                     IF DESTINATION TABLE HAS COLUMNS IN THE SAME ORDER AS EXCEL (ID , NAME,AGE,ADDRESS)
                     ,THEN U CAN COMMENT THE BELOW CODE FOR MAPPING COLUMNS*/
                    bulkCopy.ColumnMappings.Add("ID", "ID");
                    bulkCopy.ColumnMappings.Add("Name", "Name");
                    bulkCopy.ColumnMappings.Add("Age", "Age");
                    bulkCopy.ColumnMappings.Add("Address", "Address");
                    /*COLUMNN MAPPING END*/
                    bulkCopy.WriteToServer(dr);
                    LblMsg.Text = "Import Data from Excel To DB is Successful";
                }
            }
        }
    }

}

Output :

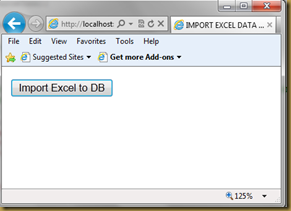
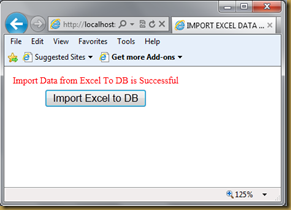
ImportExceltoDB           ImportExceltoDB_1

Wednesday, November 7, 2012

NoBot Control – Ajax ToolKit Control


Introduction :

The name itself specifies it offers protection from bots(robots or any automated software which can submit forms and give reply for messages as humans do). Generally we see using CAPTCHA to prevent entries from ROBOT , we can use this NoBot Control to achieve the same.

Uses :

1)To enhances the site security.( It performing various checks when a form is submitted )
2)To check spam and to prevent hacking to some extent.
3)To perform checks like CAPTCHA.

Attributes :

ResponseMinimumDelaySeconds - Minimum number of seconds to wait before which a postback is considered valid. If postback occurs before this minimum number of seconds , then NoBot state will be "ResponseTooSoon"
CutoffWindowSeconds - It specifies length of cut off window which tracks postbacks within the time specified using this attribute.
CutoffMaximumInstances - Maximum number of postbacks that could occur within in CutOffwindowSeconds.If number of postbacks increases by the number specified in "CutoffMaximumInstances" with in the time limit specified by "CutoffWindowSeconds" , then NoBot State will return "InvalidAddressTooActive"
OnGenerateChallengeAndResponse - Event handler to return NoBot State response.

NoBot Example :

Aspx Code :

<%@ Page Language="C#" AutoEventWireup="true" CodeFile="NoBotControl.aspx.cs" Inherits="Ajax_Controls_Examples_NoBotControl" %>

<!DOCTYPE html PUBLIC "-//W3C//DTD XHTML 1.0 Transitional//EN" "http://www.w3.org/TR/xhtml1/DTD/xhtml1-transitional.dtd">

<html xmlns="http://www.w3.org/1999/xhtml">
<head runat="server">
    <title>NoBot Control Example</title>
</head>
<body>
    <form id="form1" runat="server">
    <div>
        <ajaxToolkit:ToolkitScriptManager ID="Sc1" runat="server">
        </ajaxToolkit:ToolkitScriptManager>
        <asp:Label ID = "Label1" runat="server" Text="NoBot Message:" Font-Bold="True"></asp:Label>
        <asp:Label ID="Label2" runat="server" Font-Bold="True" ForeColor="Red" ></asp:Label>
        <br /><br />
        <asp:Button ID="btnCheck" runat="server" Text="Check" OnClick="btnCheck_Click" />
        <ajaxToolkit:NoBot ID="NoBot1" runat="server" CutoffWindowSeconds="15"
            ResponseMinimumDelaySeconds="3" CutoffMaximumInstances="4" />
    </div>
    </form>
</body>
</html>

Code Behind :

using System;
using System.Collections.Generic;
using System.Linq;
using System.Web;
using System.Web.UI;
using System.Web.UI.WebControls;
using AjaxControlToolkit;

public partial class Ajax_Controls_Examples_NoBotControl : System.Web.UI.Page
{
    protected void Page_Load(object sender, EventArgs e)
    {

    }
    protected void btnCheck_Click(object sender, EventArgs e)
    {
        NoBotState nbs;
        if (NoBot1.IsValid(out nbs))
        {
            Label2.Text = nbs.ToString();
        }
        else
        {
            Label2.Text = nbs.ToString();
        }
    }
}

Output :

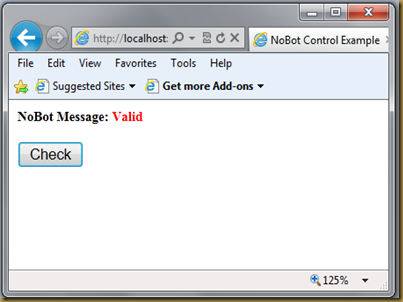
If all the checks are correct , then NoBotState will return “Valid” Message.

Nobot_1

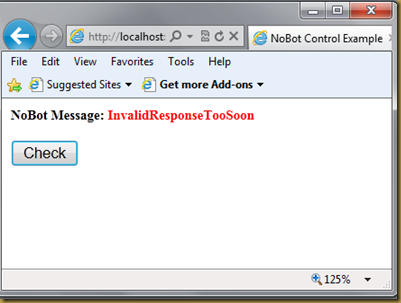
If within the time specified in "ResponseMinimumDelaySeconds" i.e  3 sec , if end user clicks on button more than once , it returns "InvalidResponseTooSoon".

nobot_2


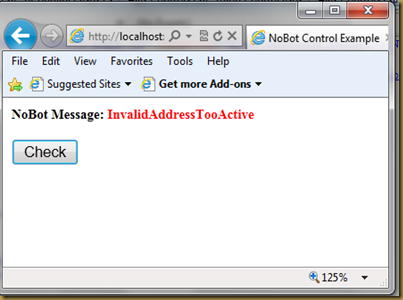
“CutoffMaximumInstances” specifies number of post backs that can occur within time specified in "CutoffWindowSeconds" , so if end user clicks button more than 4 times
within 15 sec , then it returns "InValidAddressTooActive" message.

nobot_3

TabContainer Example – Ajax ToolKit Control


TabContainer :

To present tabbed UI , TabControl can be used.If you have a page that has  lot of content to present then we can break it into tabs.TabContainer contains many TabPanels each of which represents a tab.

Important attributes of TabContainer control are :

OnActiveTabChanged : This event is fired when active (current ) tab is changed.It is a server side event.
OnClientActiveTabChanged : It is also fired when current tab is changed.It is client side event. we need to write javascript for this.
Scrollbar : used to specify alignment of Scrollbar for tab container.It takes Horizontal , vertical , both , none and auto values.

TabPanel :

TabPanel has HeaderTemplate and Content Template.Header Template is optional and can be used to specify header.
We can use either HeaderTemplate or HeaderText attribute to specify header for a tab.
All the content under a tab should be specified within ContentTemplate tag.

TabContainer Example :

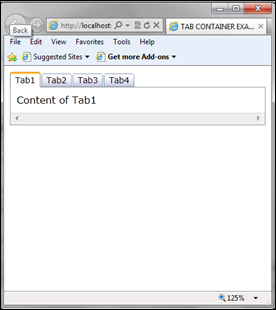
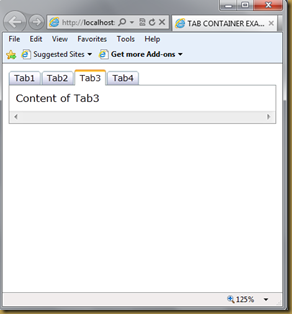
This example shows how to create tabs using TabContainer control. We can also write some events when tabs are changed which I will illustrate in next example.

Aspx Code :

<%@ Page Language="C#" AutoEventWireup="true" CodeFile="TabContainer.aspx.cs" Inherits="Ajax_Controls_Examples_TabContainer" %>

<!DOCTYPE html PUBLIC "-//W3C//DTD XHTML 1.0 Transitional//EN" "http://www.w3.org/TR/xhtml1/DTD/xhtml1-transitional.dtd">

<html xmlns="http://www.w3.org/1999/xhtml">
<head runat="server">
    <title>TAB CONTAINER EXAMPLE</title>
</head>
<body>
    <form id="form1" runat="server">
    <div>
        <ajaxToolkit:ToolkitScriptManager ID="Sc1" runat="server">
        </ajaxToolkit:ToolkitScriptManager>

        <ajaxToolkit:TabContainer ID="TabContainer1" runat="server" ScrollBars="Horizontal" >
           
            <ajaxToolkit:TabPanel ID="TabPanel1" runat="server">
                <HeaderTemplate >Tab1</HeaderTemplate>
                <ContentTemplate>Content of Tab1</ContentTemplate>
            </ajaxToolkit:TabPanel>

            <ajaxToolkit:TabPanel  ID="TabPanel2" runat="server">
                <HeaderTemplate >Tab2</HeaderTemplate>
                <ContentTemplate>Content of Tab2</ContentTemplate>
            </ajaxToolkit:TabPanel>

            <ajaxToolkit:TabPanel  ID="TabPanel3" runat="server">
                <HeaderTemplate >Tab3</HeaderTemplate>
                <ContentTemplate>Content of Tab3</ContentTemplate>
            </ajaxToolkit:TabPanel>

            <ajaxToolkit:TabPanel  ID="TabPanel4" runat="server">
                <HeaderTemplate >Tab4</HeaderTemplate>
                <ContentTemplate>Content of Tab4</ContentTemplate>
            </ajaxToolkit:TabPanel>

        </ajaxToolkit:TabContainer>
    </div>
    </form>
</body>
</html>

Output:

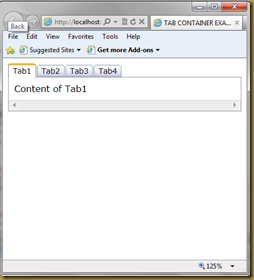
TabContainer_1             TabContainer_2 

Another TabContainer Example with events when tab is changed . For this we need to make use of “OnActiveTabChanged” or “OnClientActiveTabChaned” event of this control.

Aspx Code :

<%@ Page Language="C#" AutoEventWireup="true" CodeFile="TabContainer.aspx.cs" Inherits="Ajax_Controls_Examples_TabContainer" %>

<!DOCTYPE html PUBLIC "-//W3C//DTD XHTML 1.0 Transitional//EN" "http://www.w3.org/TR/xhtml1/DTD/xhtml1-transitional.dtd">

<html xmlns="http://www.w3.org/1999/xhtml">
<head runat="server">
    <title>TAB CONTAINER EXAMPLE</title>
</head>
<body>
    <form id="form1" runat="server">
    <div>
        <ajaxToolkit:ToolkitScriptManager ID="Sc1" runat="server">
        </ajaxToolkit:ToolkitScriptManager>
       <asp:Label ID="lblMsg" runat="server" Font-Bold="True" ForeColor="Red"></asp:Label>
        <br />        <br />
        <ajaxToolkit:TabContainer ID="TabContainer1" runat="server" ScrollBars="Horizontal"
            OnActiveTabChanged ="TabChanged_Event" AutoPostBack="true">
            <ajaxToolkit:TabPanel ID="TabPanel1" runat="server">
                <HeaderTemplate >Tab1</HeaderTemplate>
                <ContentTemplate>Content of Tab1</ContentTemplate>
            </ajaxToolkit:TabPanel>
            <ajaxToolkit:TabPanel  ID="TabPanel2" runat="server">
                <HeaderTemplate >Tab2</HeaderTemplate>
                <ContentTemplate>Content of Tab2</ContentTemplate>
            </ajaxToolkit:TabPanel>
            <ajaxToolkit:TabPanel  ID="TabPanel3" runat="server">
                <HeaderTemplate >Tab3</HeaderTemplate>
                <ContentTemplate>Content of Tab3</ContentTemplate>
            </ajaxToolkit:TabPanel>
            <ajaxToolkit:TabPanel  ID="TabPanel4" runat="server">
                <HeaderTemplate >Tab4</HeaderTemplate>
                <ContentTemplate>Content of Tab4</ContentTemplate>
            </ajaxToolkit:TabPanel>
        </ajaxToolkit:TabContainer>
    </div>
    </form>
</body>
</html>

Code Behind:

using System;
using System.Collections.Generic;
using System.Linq;
using System.Web;
using System.Web.UI;
using System.Web.UI.WebControls;

public partial class Ajax_Controls_Examples_TabContainer : System.Web.UI.Page
{
    protected void Page_Load(object sender, EventArgs e)
    {

    }
    protected void TabChanged_Event(object sender, EventArgs e)
    {
        lblMsg.Text = "TAB CHANGED";

    }
}

Output :

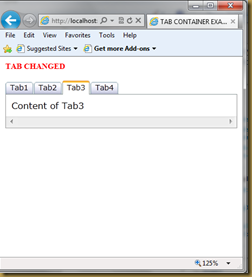
TabContainer_1                TabContainer_3

Tuesday, October 16, 2012

PagingBulletedListExtender Example


Sample Example using PagingBulletedListExtender

<form id="form1" runat="server">
    <div>
        <ajaxToolkit:ToolkitScriptManager ID="Sc1" runat="server">
        </ajaxToolkit:ToolkitScriptManager>
        <asp:BulletedList ID="BulletedList1" runat="server">
        <asp:ListItem Text="Assam" Value="1"></asp:ListItem>
        <asp:ListItem Text="Bihar" Value="2"></asp:ListItem>
        <asp:ListItem Text="Chennai" Value="3"></asp:ListItem>
        <asp:ListItem Text="Delhi" Value="4"></asp:ListItem>
        <asp:ListItem Text="Japan" Value="5"></asp:ListItem>
        <asp:ListItem Text="Rajasthan" Value="6"></asp:ListItem>       
        </asp:BulletedList>
        <ajaxToolkit:PagingBulletedListExtender ID="PagingBulletedListExtender1"
             runat="server" TargetControlID="BulletedList1">
        </ajaxToolkit:PagingBulletedListExtender>
    </div>
    </form>

Output

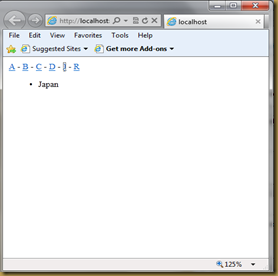
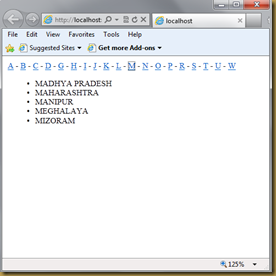
paging BulletExtender1          Paging bulleted 2

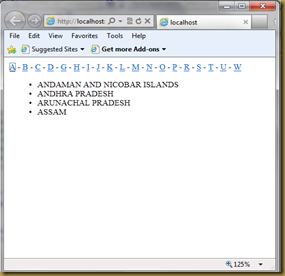
“PagingBulletedListExtender” Example which fetches list of state names from the database and displays it in alphabetical order with paging .

Aspx Code:

<form id="form1" runat="server">
   <div>
       <ajaxToolkit:ToolkitScriptManager ID="Sc1" runat="server">
       </ajaxToolkit:ToolkitScriptManager>
       <asp:BulletedList ID="BulletedList1" runat="server"
           DataTextField="state_descp" DataValueField="state_cd">
       </asp:BulletedList>
       <ajaxToolkit:PagingBulletedListExtender ID="PagingBulletedListExtender1"
            runat="server" TargetControlID="BulletedList1">
       </ajaxToolkit:PagingBulletedListExtender>
   </div>
   </form>

Code Behind:

using System;
using System.Collections.Generic;
using System.Linq;
using System.Web;
using System.Web.UI;
using System.Web.UI.WebControls;
using System.Data.Sql;
using System.Data.SqlClient;
using System.Configuration;
using System.Data;

public partial class Ajax_Controls_Examples_PagingBulletedListExtender : System.Web.UI.Page
{
    protected void Page_Load(object sender, EventArgs e)
    {
        GetData();
    }
    protected void GetData()
    {
        DataTable DtStates = new DataTable();
        SqlConnection Con = new SqlConnection(ConfigurationManager.ConnectionStrings["MyConString"].ToString());
        Con.Open();

        SqlCommand Cmd = new SqlCommand("Get_StateCodes" , Con);
        Cmd.CommandType = CommandType.StoredProcedure;

        SqlDataAdapter Adp = new SqlDataAdapter(Cmd);
        Adp.Fill(DtStates);

        BulletedList1.DataSource = DtStates;
        BulletedList1.DataBind();

    }
}

Output :

Paging Bulleted 3              PagingBulleted 4

NumericUpDownExtender Example


Sample Example using NumericUpDownExtender – AJAX ToolKit Control

<%@ Page Language="C#" AutoEventWireup="true" CodeFile="NumericUpDownExtender.aspx.cs"
Inherits="Ajax_Controls_Examples_NumericUpDownExtender" %>

<!DOCTYPE html PUBLIC "-//W3C//DTD XHTML 1.0 Transitional//EN"
     "http://www.w3.org/TR/xhtml1/DTD/xhtml1-transitional.dtd">

<html xmlns="http://www.w3.org/1999/xhtml">
<head runat="server">
    <title>Numeric up Down Extender</title>
</head>
<body>
    <form id="form1" runat="server">
    <div>
        <ajaxToolkit:ToolkitScriptManager ID="Sc1" runat="server">
        </ajaxToolkit:ToolkitScriptManager>

        <asp:TextBox id="txtCounter" runat="server"></asp:TextBox>
        <ajaxToolkit:NumericUpDownExtender ID="NumericUpDownExtender1"  runat="server"
            TargetControlID="txtCounter" Minimum="1" Maximum="10" Width="130">
        </ajaxToolkit:NumericUpDownExtender>      
    </div>
    </form>
</body>
</html>

Output

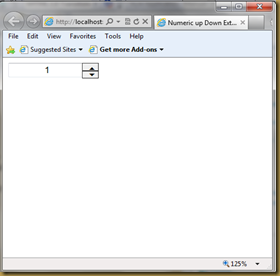
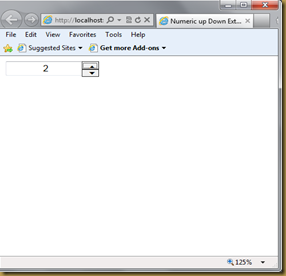
NumericupdownExtender1               NumericUpDownExtender2

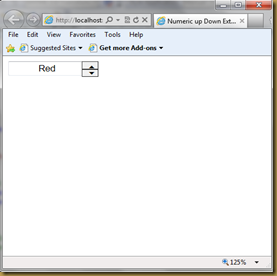
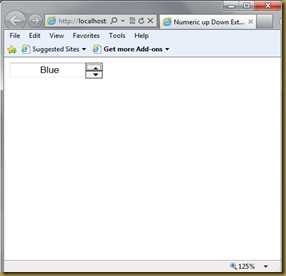
We can use NumericUpDownExtender not only for incrementing numbers but also with characters using its “RefValues” attribute. We need to specify comma separated values .

NumericUpDownExtender Example using RefValues attribute:

<%@ Page Language="C#" AutoEventWireup="true" CodeFile="NumericUpDownExtender.aspx.cs"
Inherits="Ajax_Controls_Examples_NumericUpDownExtender" %>

<!DOCTYPE html PUBLIC "-//W3C//DTD XHTML 1.0 Transitional//EN"
     "http://www.w3.org/TR/xhtml1/DTD/xhtml1-transitional.dtd">

<html xmlns="http://www.w3.org/1999/xhtml">
<head runat="server">
    <title>Numeric up Down Extender</title>
</head>
<body>
    <form id="form1" runat="server">
    <div>
        <ajaxToolkit:ToolkitScriptManager ID="Sc1" runat="server">
        </ajaxToolkit:ToolkitScriptManager>
        <asp:TextBox id="txtCounter" runat="server"></asp:TextBox>       
        <ajaxToolkit:NumericUpDownExtender ID="NumericUpDownExtender1" runat="server"
            TargetControlID="txtCounter" RefValues="Red;Blue;Green;Yellow;" Width="130">
        </ajaxToolkit:NumericUpDownExtender>      
    </div>
    </form>
</body>
</html>

Ouput :

NumericUpDownIndicator3         NumericUpDownIndicator4

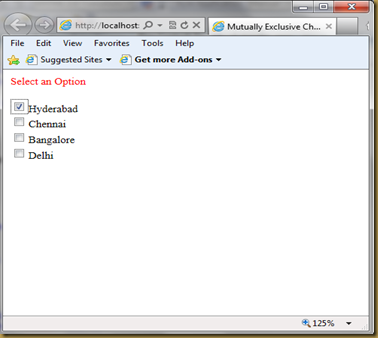
MutuallyExclusiveCheckBoxExtender Example


Sample Example using MutuallyExclusiveCheckBoxExtender – AJAX ToolKit Control

Aspx Code:

<%@ Page Language="C#" AutoEventWireup="true" CodeFile="MutuallyExclusiveCheckBoxExtender.aspx.cs"
Inherits="Ajax_Controls_Examples_MutuallyExclusiveCheckBoxExtender" %>

<!DOCTYPE html PUBLIC "-//W3C//DTD XHTML 1.0 Transitional//EN"
"http://www.w3.org/TR/xhtml1/DTD/xhtml1-transitional.dtd">

<html xmlns="http://www.w3.org/1999/xhtml">
<head runat="server">
    <title>Mutually Exclusive CheckBox Extender Control Example</title>
</head>
<body>
    <form id="form1" runat="server">
    <div>
        <ajaxToolkit:ToolkitScriptManager ID="Sc1" runat="server">
        </ajaxToolkit:ToolkitScriptManager>
        <asp:Label ID="lblText" runat="server" Text="Select an Option" ForeColor="Red" >
        </asp:Label>
        <br /><br />
        <asp:CheckBox ID="CheckBox1" runat="server" Text="Hyderabad" />
        <ajaxToolkit:MutuallyExclusiveCheckBoxExtender ID="M1" runat="server"
             TargetControlID="CheckBox1" Key="Cities">
        </ajaxToolkit:MutuallyExclusiveCheckBoxExtender>
        <br />
        <asp:CheckBox ID="CheckBox2" runat="server" Text="Chennai" />
        <ajaxToolkit:MutuallyExclusiveCheckBoxExtender ID="M2" runat="server"
             TargetControlID="CheckBox2" Key="Cities">
        </ajaxToolkit:MutuallyExclusiveCheckBoxExtender>
        <br />
        <asp:CheckBox ID="CheckBox3" runat="server" Text="Bangalore" />
        <ajaxToolkit:MutuallyExclusiveCheckBoxExtender ID="M3" runat="server"
             TargetControlID="CheckBox3" Key="Cities">
        </ajaxToolkit:MutuallyExclusiveCheckBoxExtender>
        <br />
        <asp:CheckBox ID="CheckBox4" runat="server" Text="Delhi" />
        <ajaxToolkit:MutuallyExclusiveCheckBoxExtender ID="M4" runat="server"
             TargetControlID="CheckBox4" Key="Cities">
        </ajaxToolkit:MutuallyExclusiveCheckBoxExtender>
        <br />
    </div>
    </form>
</body>
</html>

Output:

MutuallyExclusiveChkbxExtender

ListSearchExtender Example


ListSearchExtender Example using DropDownList

Aspx Code :

<%@ Page Language="C#" AutoEventWireup="true" CodeFile="ListSearchExtender.aspx.cs"
Inherits="Ajax_Controls_Examples_ListSearchExtender" %>

<!DOCTYPE html PUBLIC "-//W3C//DTD XHTML 1.0 Transitional//EN"
"http://www.w3.org/TR/xhtml1/DTD/xhtml1-transitional.dtd">

<html xmlns="http://www.w3.org/1999/xhtml">
<head runat="server">
    <title>LIST SEARCH EXTENDER CONTROL EXAMPLE</title>
</head>
<body>
    <form id="form1" runat="server">
    <div>
    <ajaxToolkit:ToolkitScriptManager ID="SC1" runat="server">
    </ajaxToolkit:ToolkitScriptManager>
    <br />    <br />    <br />
    <asp:DropDownList ID="ddlCities" runat="server">
    <asp:ListItem Text="Select Your City" Value="0"></asp:ListItem>
    <asp:ListItem Text="Hyderabad" Value="1"></asp:ListItem>
    <asp:ListItem Text="Chennai" Value="2"></asp:ListItem>
    <asp:ListItem Text="Bangalore" Value="3"></asp:ListItem>
    <asp:ListItem Text="Mumbai" Value="4"></asp:ListItem>
    <asp:ListItem Text="Kerala" Value="5"></asp:ListItem>
    </asp:DropDownList>
    <ajaxToolkit:ListSearchExtender ID="Ls1" runat="server"
         TargetControlID="ddlCities">
    </ajaxToolkit:ListSearchExtender>
    </div>
    </form>
</body>
</html>

Output :

ListSearchExtender               ListSearchExtender1

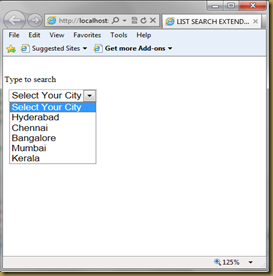
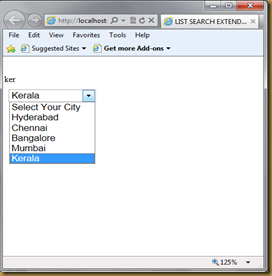
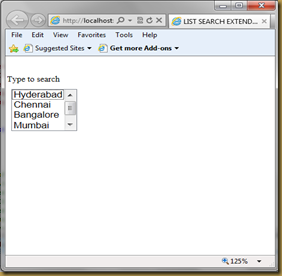
As soon as end user clicks on the DropDownList the text “Type to Search” will appear. User can type text to search for an item in the list.If that item is present in the list it will be selected.

ListSearchExtender Example using ListBox

Aspx Code :

<%@ Page Language="C#" AutoEventWireup="true" CodeFile="ListSearchExtender.aspx.cs"
Inherits="Ajax_Controls_Examples_ListSearchExtender" %>

<!DOCTYPE html PUBLIC "-//W3C//DTD XHTML 1.0 Transitional//EN"
"http://www.w3.org/TR/xhtml1/DTD/xhtml1-transitional.dtd">

<html xmlns="http://www.w3.org/1999/xhtml">
<head runat="server">
    <title>LIST SEARCH EXTENDER CONTROL EXAMPLE</title>
</head>
<body>
    <form id="form1" runat="server">
    <div>
    <ajaxToolkit:ToolkitScriptManager ID="SC1" runat="server">
    </ajaxToolkit:ToolkitScriptManager>
    <br />    <br />    <br />
   
    <asp:ListBox ID="LstCities" runat="server">
    <asp:ListItem Text="Hyderabad" Value="1"></asp:ListItem>
    <asp:ListItem Text="Chennai" Value="2"></asp:ListItem>
    <asp:ListItem Text="Bangalore" Value="3"></asp:ListItem>
    <asp:ListItem Text="Mumbai" Value="4"></asp:ListItem>
    <asp:ListItem Text="Kerala" Value="5"></asp:ListItem>
    </asp:ListBox>
     <ajaxToolkit:ListSearchExtender ID="ListSearchExtender1" runat="server"
         TargetControlID="LstCities">
    </ajaxToolkit:ListSearchExtender>
    </div>
    </form>
</body>
</html>

Output :

listSearchExtender3         ListSearchExtender5

As soon as end user clicks on the ListBox the text “Type to Search” will appear. User can type text to search for an item in the list.If that item is present in the list it will be selected.

MaskedEditExtender Example


Sample Example of MaskedEditExtender Control

Aspx Code :

<%@ Page Language="C#" AutoEventWireup="true" CodeFile="MaskedEditExtender.aspx.cs"
Inherits="Ajax_Controls_Examples_MaskedEditExtender" %>

<!DOCTYPE html PUBLIC "-//W3C//DTD XHTML 1.0 Transitional//EN"
"http://www.w3.org/TR/xhtml1/DTD/xhtml1-transitional.dtd">

<html xmlns="http://www.w3.org/1999/xhtml">
<head runat="server">
    <title>MASKED EDIT EXTENDER CONTROL EXAMPLE</title>
</head>
<body>
    <form id="form1" runat="server">
    <div>
        <ajaxToolkit:ToolkitScriptManager ID="Sc1" runat="server">
        </ajaxToolkit:ToolkitScriptManager>
        Enter Number:<asp:TextBox ID="TxtNum" runat="server"></asp:TextBox>
        <ajaxToolkit:MaskedEditExtender ID="MaskEditExtender1" runat="server"
             TargetControlID="TxtNum" MaskType="Number" Mask="999">
        </ajaxToolkit:MaskedEditExtender>
      </div>
    </form>
</body>
</html>

Output :

MaskedEditExtender1           MaskedEditExtender2

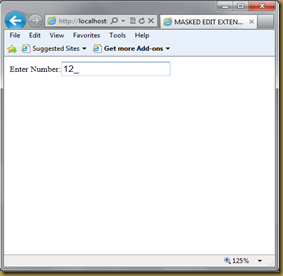
When TextBox gets focus it shows the format of the text to be entered. like in the above example Mask value is “999” , so it shows ---. if it is “99/99/9999” then it shows –/—/----

In the above example Mask value is “999” , which means it allows only 3 digits to be entered in the textbox. If user enters only less than 3 digits then it takes 0 ‘s by default. if user leaves the textbox empty , it will not return any error as there is no validation for empty input.

To put validation for empty input , we can use “MaskedEditValidator” Control.

Here there is another example of “MaskedEditExtender” to take date input in the textbox.For this we specify the date format in the Mask attribute as “99/99/9999” .  We can use ‘-‘ delimiter also to specify date format. (99-99-9999)

Aspx Code :

<%@ Page Language="C#" AutoEventWireup="true" CodeFile="MaskedEditExtender.aspx.cs"
Inherits="Ajax_Controls_Examples_MaskedEditExtender" %>

<!DOCTYPE html PUBLIC "-//W3C//DTD XHTML 1.0 Transitional//EN"
"http://www.w3.org/TR/xhtml1/DTD/xhtml1-transitional.dtd">

<html xmlns="http://www.w3.org/1999/xhtml">
<head runat="server">
    <title>MASKED EDIT EXTENDER CONTROL EXAMPLE</title>
</head>
<body>
    <form id="form1" runat="server">
    <div>
        <ajaxToolkit:ToolkitScriptManager ID="Sc1" runat="server">
        </ajaxToolkit:ToolkitScriptManager>
        Enter Date:<asp:TextBox ID="txtDate" runat="server"></asp:TextBox>
        <ajaxToolkit:MaskedEditExtender ID="MaskedEditExtender1" runat="server"
             TargetControlID="txtDate" MaskType="Date" Mask="99/99/9999">
        </ajaxToolkit:MaskedEditExtender>
    </div>
    </form>
</body>
</html>

Output :

MaskedEditExtender3                 MaskedEditExtender4

Friday, October 12, 2012

WebParts in ASP.Net


Introduction

It gives an option to the end user to choose which items he wants to appear on the page or hi sportal and which items to hide.Its a way for dynamic web designing.

WebParts allows end users either to add , remove or move items on his portal and also change the appearance of the items. Enduser can personalize his page according to his wish.

Once users has personalised the page , we need to store his option , so that on his next login he would not again repeat this. To store this information earlier developers used concept of personalization which is difficult to maintain. Now it became easy with the help of WebParts.

WebPartManager

It’s a non visual control .It is used to control and manage the WebParts in the page. It controls the communications that happen between elements in a zone and between elements in a zone to elements in another zone. All the pages using web parts must have this WebPartManager. It can be placed in the master page, so that there wont be any need to use it in all the content pages.

WebPartZone

WebParts are defined in zones. We can any web parts to the page.

All the controls which we want to have in a zone should be placed inside ZoneTemplate tag.

Modes of WebParts

WebPartManager supports different modes. They are

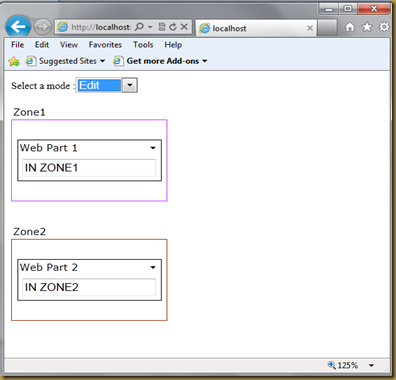
Browse : in this mode we can minimise or close the web parts but we can not move them. It we minimize the WebParts , we can again restore them. If we close WebParts it will be removed from the page. We can re-open the closed WebParts in catalog mode.

Display / Design : Enduser can drag and drop WebParts in this mode but can not edit them to change the appearance or its behaviour. Enduser can drag a WebParts only into another WebParts zone and not on to any location on the page.

Edit : In this mode enduser can edit the WebParts like changing the appearance , behaviour , properties and layout of WebParts.

Catalog : It allows the enduser to add or remove WebParts from the page.

Connect : it facilitates for the communication among the elements of different WebParts. For example to send text input given in one WebParts to another WebParts , we can use connect mode.

WebParts Example

ASPX Code

<form id="form1" runat="server">

       <asp:ScriptManager ID="ScriptManager1" runat="server" />

       <asp:WebPartManager ID="WebPart1" runat="server">
       </asp:WebPartManager>
        <asp:CatalogZone ID="CatalogZone1" runat="server">  
       <ZoneTemplate>
       <asp:PageCatalogPart ID="p1" runat="server"  />    
       </ZoneTemplate>
       </asp:CatalogZone>
       <asp:EditorZone ID="EditorZone1" runat="server">
       <ZoneTemplate>
           <asp:AppearanceEditorPart ID="AppearanceEditorPart1" runat="server" />
            <asp:LayoutEditorPart ID="LayoutEditorPart1" runat="server" />
           <asp:BehaviorEditorPart ID="BehaviorEditorPart1" runat="server" />
            <asp:PropertyGridEditorPart ID="PropertyGridEditorPart1" runat="server">
           </asp:PropertyGridEditorPart>
       </ZoneTemplate>
       </asp:EditorZone>
       Select a mode :<asp:DropDownList ID="ddlWepPartsMode" runat="server" OnSelectedIndexChanged="ddlWepPartsMode_OnSelectedIndexChanged"
            AutoPostBack="true">
            <asp:ListItem Text="Browse" Value="Browse"></asp:ListItem>
            <asp:ListItem Text="Design" Value="Design"></asp:ListItem>
            <asp:ListItem Text="Edit" Value="Edit"></asp:ListItem>
            <asp:ListItem Text="Catalog" Value="Catalog"></asp:ListItem>
       </asp:DropDownList>
       <br />
       <br />
       <asp:WebPartZone ID="Zone1" runat="server" BorderColor="#CC33FF"
           Font-Names="Verdana" Padding="6" >
           <ZoneTemplate>
               <asp:TextBox ID="txtZone1" runat="server" Text="IN ZONE1"></asp:TextBox>
           </ZoneTemplate>
       </asp:WebPartZone>
           <br />
           <br /> 
           <asp:WebPartZone ID="Zone2" runat="server" BorderColor="#993300"
               Font-Names="Verdana" Padding="6" >
               <ZoneTemplate>
                   <asp:TextBox ID="TextBox1" runat="server" Text="IN ZONE2"></asp:TextBox>
               </ZoneTemplate>
           </asp:WebPartZone>

   </form>

Code Behind

using System;
using System.Collections.Generic;
using System.Linq;
using System.Web;
using System.Web.UI;
using System.Web.UI.WebControls;
using System.Web.UI.WebControls.WebParts;

public partial class Web_Parts_Drag_and_Drop_Webparts : System.Web.UI.Page
{
    protected void Page_Load(object sender, EventArgs e)
    {

    }

    protected void ddlWepPartsMode_OnSelectedIndexChanged(object sender, EventArgs e)
    {
        if (ddlWepPartsMode.SelectedValue == "Browse")
        {
            WebPart1.DisplayMode = WebPartManager.BrowseDisplayMode;
        }
        else if (ddlWepPartsMode.SelectedValue == "Design")
        {
            WebPart1.DisplayMode = WebPartManager.DesignDisplayMode;
        }
        else if (ddlWepPartsMode.SelectedValue == "Edit")
        {
            WebPart1.DisplayMode = WebPartManager.EditDisplayMode;
        }
        else if (ddlWepPartsMode.SelectedValue == "Catalog")
        {
            WebPart1.DisplayMode = WebPartManager.CatalogDisplayMode;
        }     
    }

}

Output

WebParts1

Monday, October 8, 2012

TreeView Control Example


In this article i will illustrate how to use treeview control.

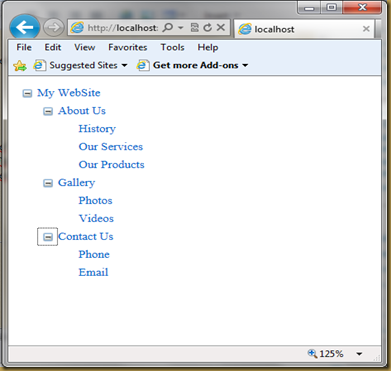
TreeView Control allows to create a multi level navigation menu.

Create the menu items that treeview has to display in an XML file. Then bind this XML file to treeview control.

1)Create XML file with the menu items.

<?xml version="1.0" encoding="utf-8" ?>
<MyHomepage>
    <Menu Name="About Us">
        <SubMenu Title="History"></SubMenu>
        <SubMenu Title="Our Services"></SubMenu>
        <SubMenu Title="Our Products"></SubMenu>       
    </Menu>
    <Menu Name="Gallery">
        <SubMenu Title="Photos"></SubMenu>
        <SubMenu Title="Videos"></SubMenu>       
    </Menu>
    <Menu Name="Contact Us">
        <SubMenu Title="Phone"></SubMenu>
        <SubMenu Title="Email"></SubMenu>
    </Menu>
</MyHomepage>

Create an aspx page named “TreeView.aspx” and then Now drag and drop TreeView Control and XmlDataSource Controls. Assign Xml file path to “DataFile” attribute of “XmlDataSource” . Then Assign “XmlDataSource” ID to “DataSourceID” attribute of “TreeView” Control.

Specify the databindings as follows and execute it.

<form id="form1" runat="server">
   <div>
       <asp:XmlDataSource ID="XmlDataSource1" runat="server" DataFile="XMLFile.xml">
       </asp:XmlDataSource>
       <asp:TreeView ID="TreeView1" runat="server" DataSourceID="XmlDataSource1">
       <DataBindings>
           <asp:TreeNodeBinding DataMember="MyHomepage" Text="My WebSite" />
           <asp:TreeNodeBinding DataMember="Menu" TextField="Name" />
           <asp:TreeNodeBinding DataMember="SubMenu" TextField="Title" />
       </DataBindings>
       </asp:TreeView>
   </div>
   </form>

Output:

Treeview1

Thursday, October 4, 2012

Creating and Consuming a Web Service

In this article i will illustrate how to create a Sample web service and consume it.

Creating Simple Calculator Web Service

Create a new website and create a folder named “Web Service”.

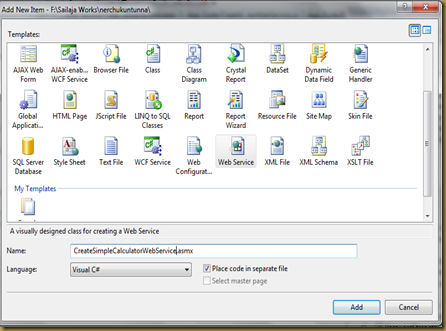
Now select Add Item and  Select “Web Service” from the templates and name it as “CreateSimpleCalculatorWebService”.
Ws1

It Creates “CreateSimpleCalculatorWebService.asmx” in your folder and “CreateSimpleCalculatorWebService.cs” will be placed in “App_Code” folder.

Now if you see , by default “HelloWorld” web method definition will be there in the cs file.


[WebMethod]
public string HelloWorld() {
return "Hello World";
}

[webMethod] , its represents attribute.

To make a function accessible or invoked remotely we need to place this [webMethod] with the function definition. And the function should take “public” access specifier only. if “Private” or “protected” is used it could not be accessed out side the class.

so we will write a function (WebMethod) which adds two numbers and returns the result as follows.

[WebMethod]
    public int addNums(int a, int b)
    {
        return a + b;
    }

now execute this and you can see the following output.

ws2

To test the methods in your web service click on the hyperlink with that function name. Suppose when you click on the addnums hyperlink , it prompts for the user input and invokes the method on click of Invoke button.
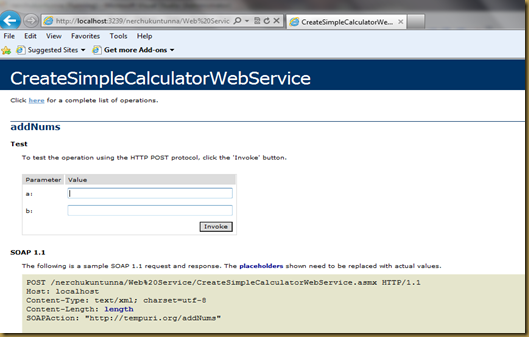
ws3

Output window after entering the required input and clicking on invoke button.

ws4

Consume  Web Service:

We have learnt to create a web service . Now we will see how to consume this in our project or website.

Right click the same folder “WebService” and Select “Add Item”. Select “WebForm” and name it “ConsumeWebService.aspx”.

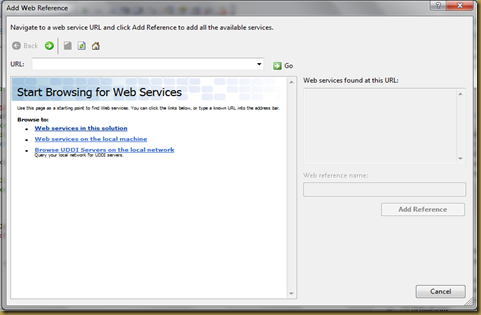
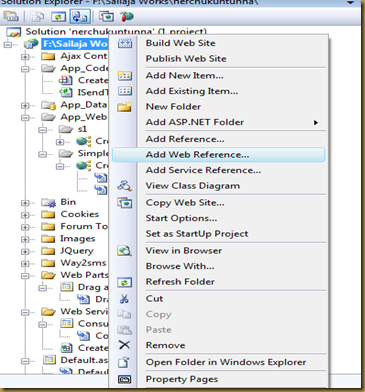
Right click the solution and select “Add Web Reference” . 
Ws5Next

ws6

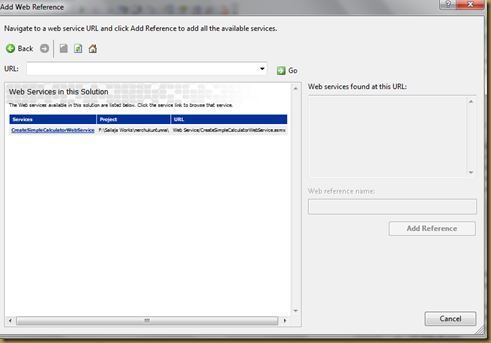
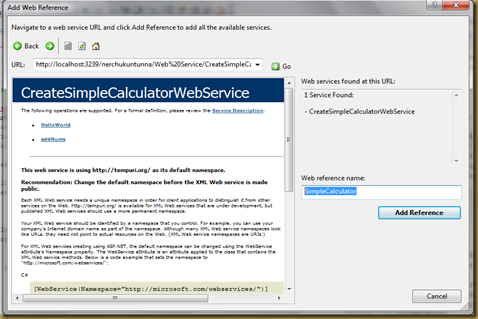
Now Click on the link  “Web Services in this solution” . It shows all the web services in your solution. As we have created “ CreateSimpleCalculatorWebService” web service , it will be shown in the list.

or

Copy paste the link of the web service that we have created and click “Go” . ( execute “CreateSimpleCalculatorWebService.asmx” and copy that link from the browser)
ws7

Now select the web service .It displays all the methods in the web service that are exposed. Give a any reference name to web service and click ok.and give a any reference name (say here I gave “SimpleCalculator”) and click on “Add Reference”
ws8

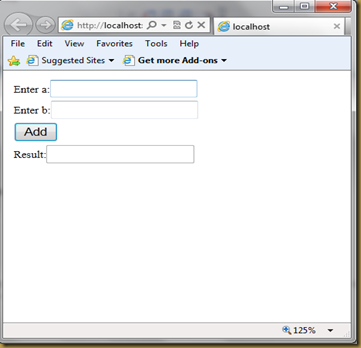
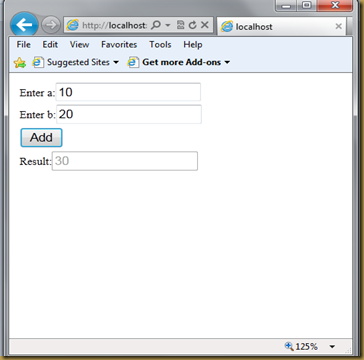
Now in “ConsumeWebService.aspx” add two text boxes to input two numbers and a “Add” button on click of which “addnum” web method is invoked and the result is displayed in result textbox.

To work with web services import this namespace “System.Web.Services;”

Aspx Code:

<%@ Page Language="C#" AutoEventWireup="true" CodeFile="ConsumeWebService.aspx.cs" Inherits="Web_Service_ConsumeWebService" %>

<!DOCTYPE html PUBLIC "-//W3C//DTD XHTML 1.0 Transitional//EN" "http://www.w3.org/TR/xhtml1/DTD/xhtml1-transitional.dtd">

<html xmlns="http://www.w3.org/1999/xhtml">
<head runat="server">
    <title></title>
</head>
<body>
    <form id="form1" runat="server">
    <div>
        <table>
            <tr>
            <td>   
                Enter a:<asp:TextBox ID="txta" runat="server"></asp:TextBox><br />
            </td>
            </tr>
            <tr>
            <td>
                Enter b:<asp:TextBox ID="txtb" runat="server"></asp:TextBox><br />
            </td>
            </tr>
            <tr>
            <td>
                <asp:Button ID="btnAdd" runat="server" Text="Add" OnClick="btnAdd_Click" />
            </td>
            </tr>
            <tr>
            <td>
                Result:<asp:TextBox ID="txtResult" runat="server" Enabled="false"></asp:TextBox>
            </td>
            </tr>
        </table>
    </div>
    </form>
</body>
</html>

create an object for the web service class using reference name and invoke the required web method.

SimpleCalculator.CreateSimpleCalculatorWebService obj = new SimpleCalculator.CreateSimpleCalculatorWebService();

Code Behind :

using System;
using System.Collections.Generic;
using System.Linq;
using System.Web;
using System.Web.UI;
using System.Web.UI.WebControls;
using System.Web.Services;

public partial class Web_Service_ConsumeWebService : System.Web.UI.Page
{
    protected void Page_Load(object sender, EventArgs e)
    {

    }
    protected void btnAdd_Click(object sender, EventArgs e)
    {
        SimpleCalculator.CreateSimpleCalculatorWebService obj = new SimpleCalculator.CreateSimpleCalculatorWebService();
        txtResult.Text =  Convert.ToString(obj.addNums(Int32.Parse(txta.Text) , Int32.Parse(txtb.Text)));
    }
}

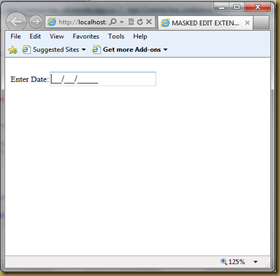
Output:
ws9

ws10